Shape files are nearly ubiquitous in the world of GIS and CartoMobile is adept at working with them. There are two ways to import a shape file: as a new map, and as a layer in an existing map. We will cover both methods in this section.
In both cases, the shape file must be loaded onto the device prior to importing.
Beginning with version 1.1, CartoMobile can work with shape files that contain any projection that it knows how to reverse. The projections for the shapefiles stored in the Documents for CartoMobile will always be the same as the original shape file. |
Copying a Shape File to your Device
Attach the device to your Mac or PC and open iTunes
The device should show up in the source list in iTunes
Select the device in the Source list and choose the Apps tab
The Apps tab should be selected
Click on the device button at the top of the iTunes window
The screen should change to the device window with Summary selected
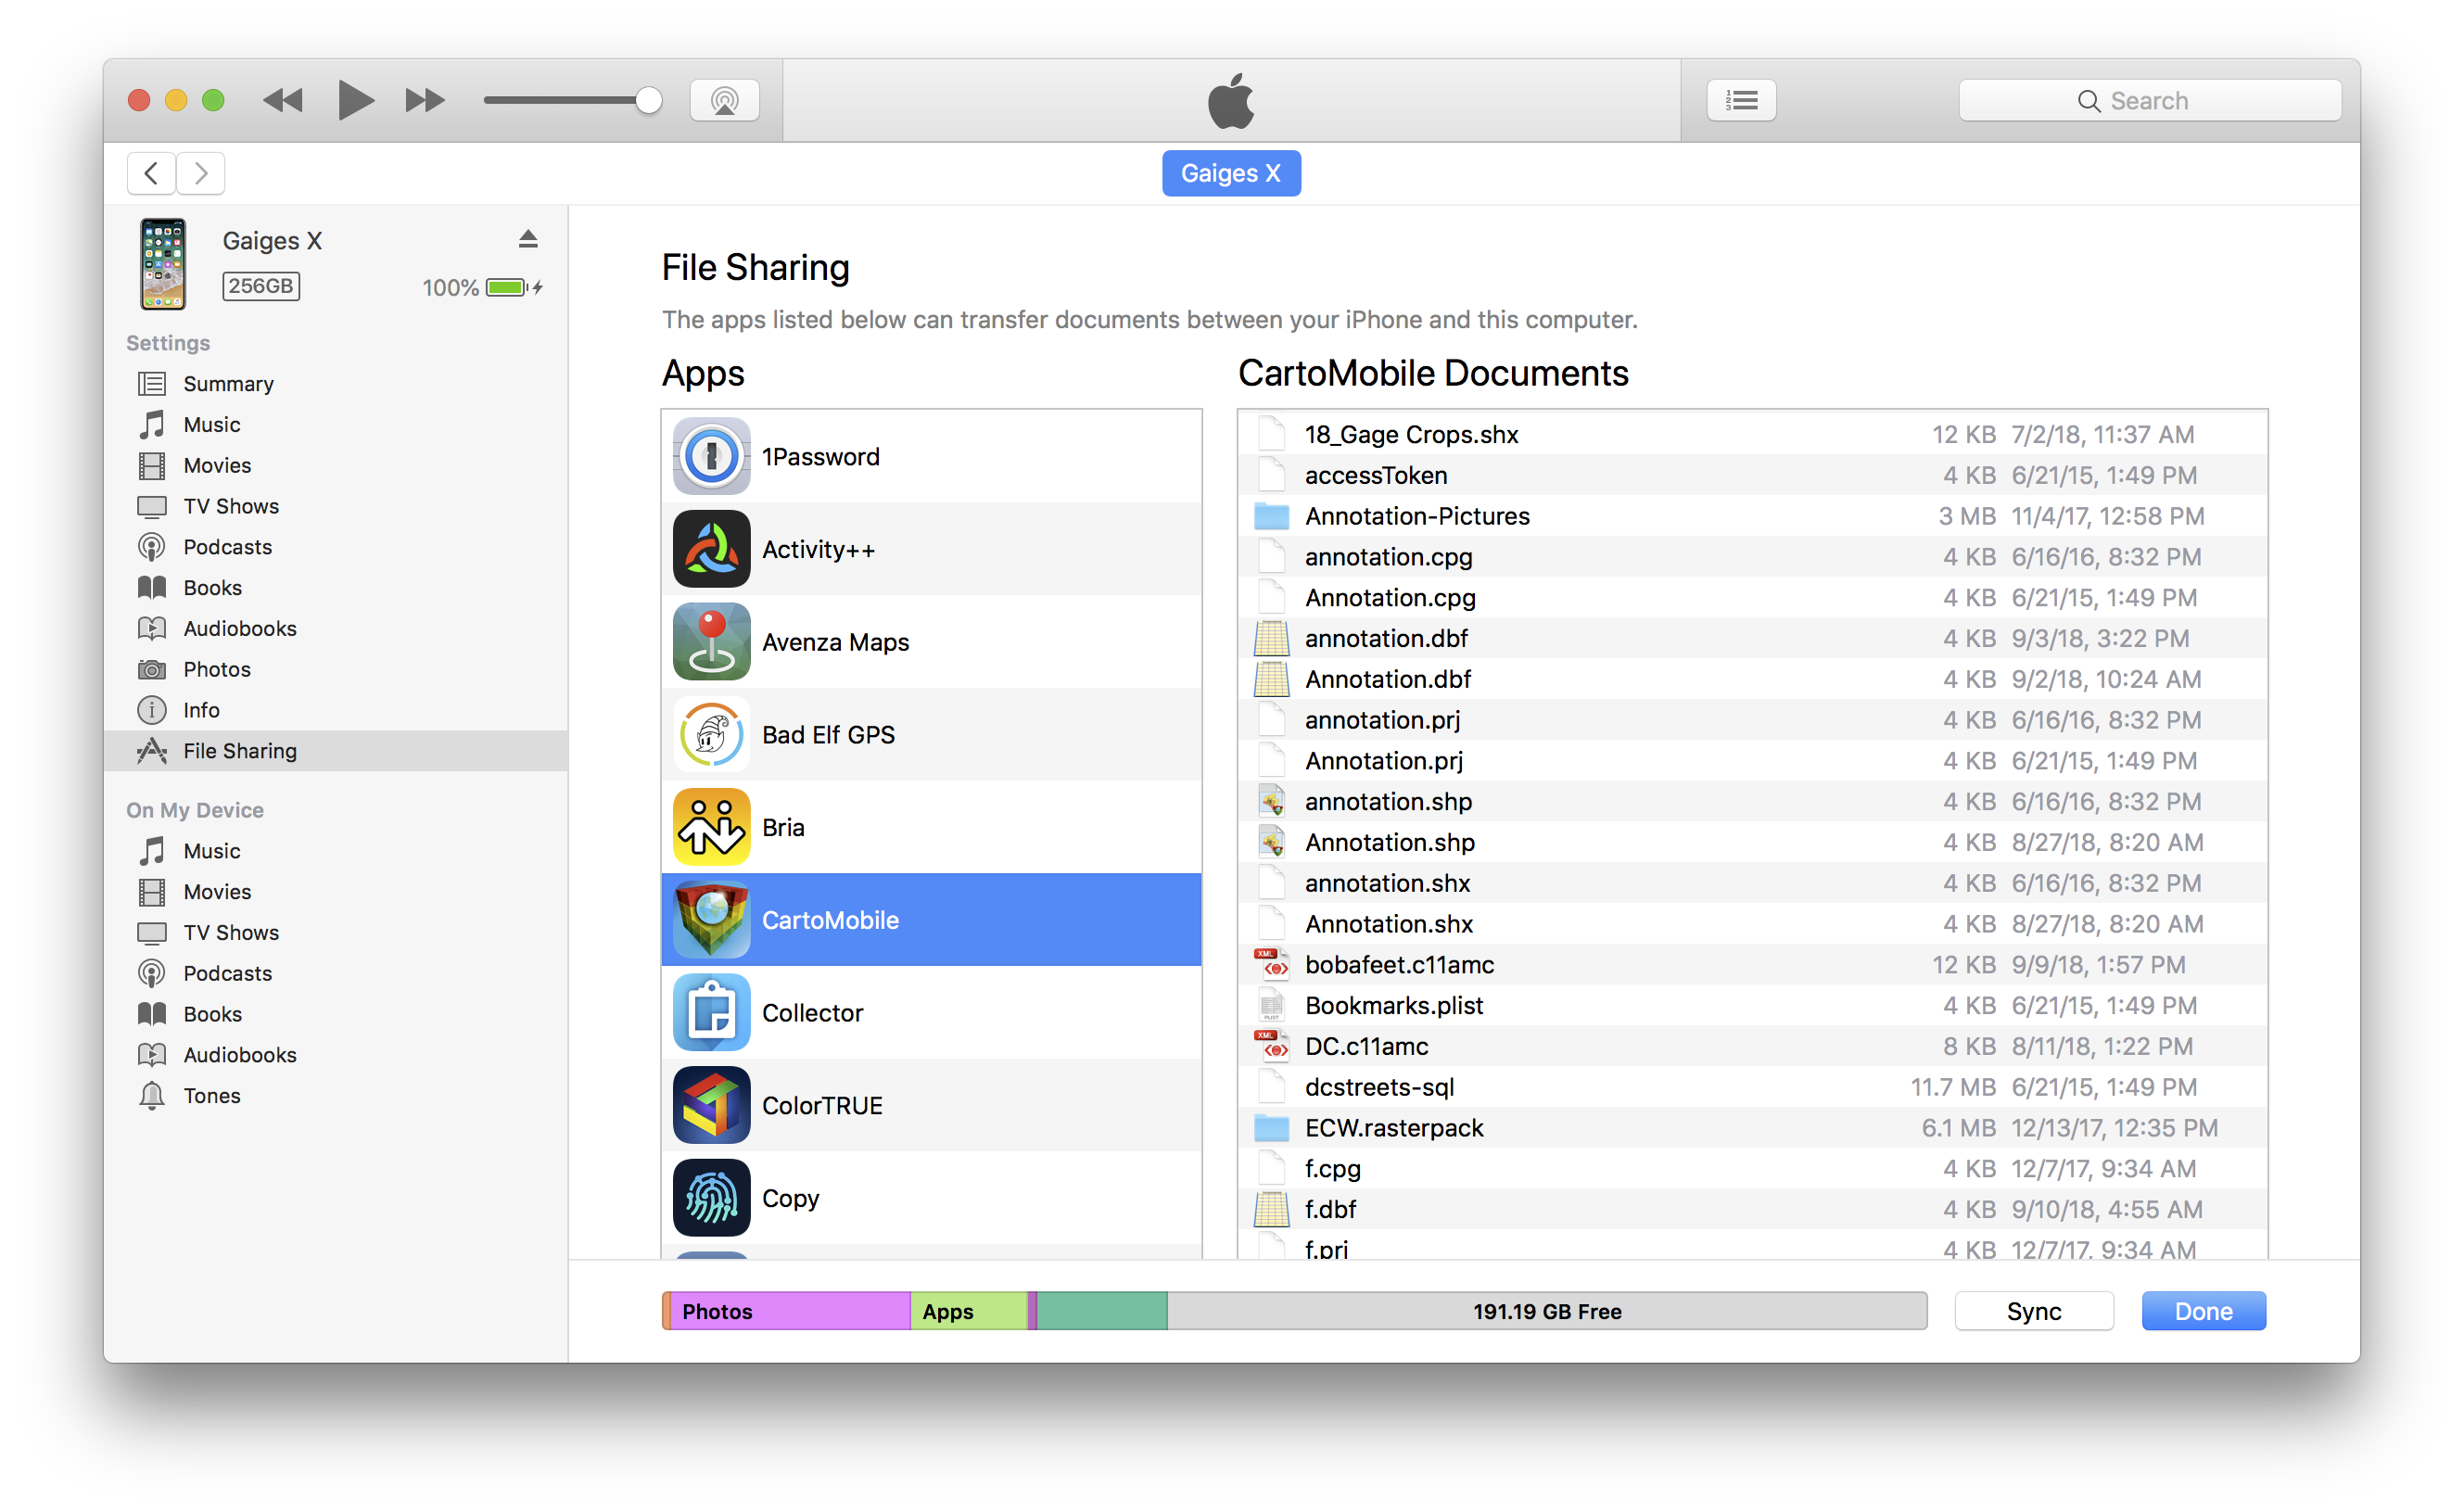
Select File Sharing in the source list (side bar)
Scroll down in the Apps section and select CartoMobile
The pane to the right (labeled CartoMobile Documents) will now be available
Drag all of the components of the shape file (the .shp, .shx, .dbf, .prj, and .cpg if it exists) to the CartoMobile Documents pane
Click on the button and then select all of the components of the shape file as above
The files should appear in the CartoMobile Documents pane
Importing a Shape File as a New Map
Tap on the icon in the lower right of the screen on your device
Settings panel should slide up
Tap on
Map panel should slide in
Tap on
A list of all shape files available on the device will be shown
Tap on the desired shape file name
A new map will be created with the name of the shape file and you will be placed back at the Map panel
At this point, you may tap the name of the Map to make it the active map
Importing a Shape File into an existing Map
Tap on the icon in the lower right of the screen on your device
Settings panel should slide up.
Tap on
Map panel should slide in.
Tap the button at the top of the screen
Blue disclosure buttons will appear on each local Map in your list
Tap the blue disclosure button on the Map that you want to edit
The editing panel for your map will slide in, showing a list of overlay layers and base maps.
Tap in the Overlays list
The shape file selection panel will slide in, showing a list of all shape files on the device
Tap on the desired shape file name
A new layer will be added to your map with the name of the layer
When you are done changing the Map, tap the button
The Map panel will slide back in, showing a list of all maps (still in edit mode)
Tap the button to exit edit mode and return to selection mode
The blue disclosure buttons will disappear and you can now select your map
