This section covers the new side-by-side georeferencing tool, introduced in Cartographica 1.5.
There are times when raster data is delivered without spatial reference information. If you have an ungeoreferenced image, you will need to georeference it before it will show up correctly on the Map. In these cases, Cartographica can be used to adjust the images for their location, a process called Georeferencing.
![[Note]](Graphics/note.svg) | |
Georeferencing is often a tedious task, and if there's a possibility that the spatial components exist for the raster files you are working with, you should seek these out. |
Cartographica has the ability to georeference raster data manually through the use of Ground Control Points or georeference matrices. Georeferencing involves telling Cartographica the location and size of the raster image relative to some known Coordinate Reference System (CRS), so that it can be displayed correctly along with other data. In order to appropriately georeference an image, you will need to have some form of reference layer, such as a vector map of the area or a live map.
In order to adjust georeferencing via a matrix, refer to the Section 9.3, “Georeferencing Raster Layers (in-place)”. That mechanism is mostly of use when you have knowledge of the exact location of an image as well as the size of an individual pixel in x and y directions. For most manual georeferencing, you will want to use this mechanism.
Georeferencing Raster Layers
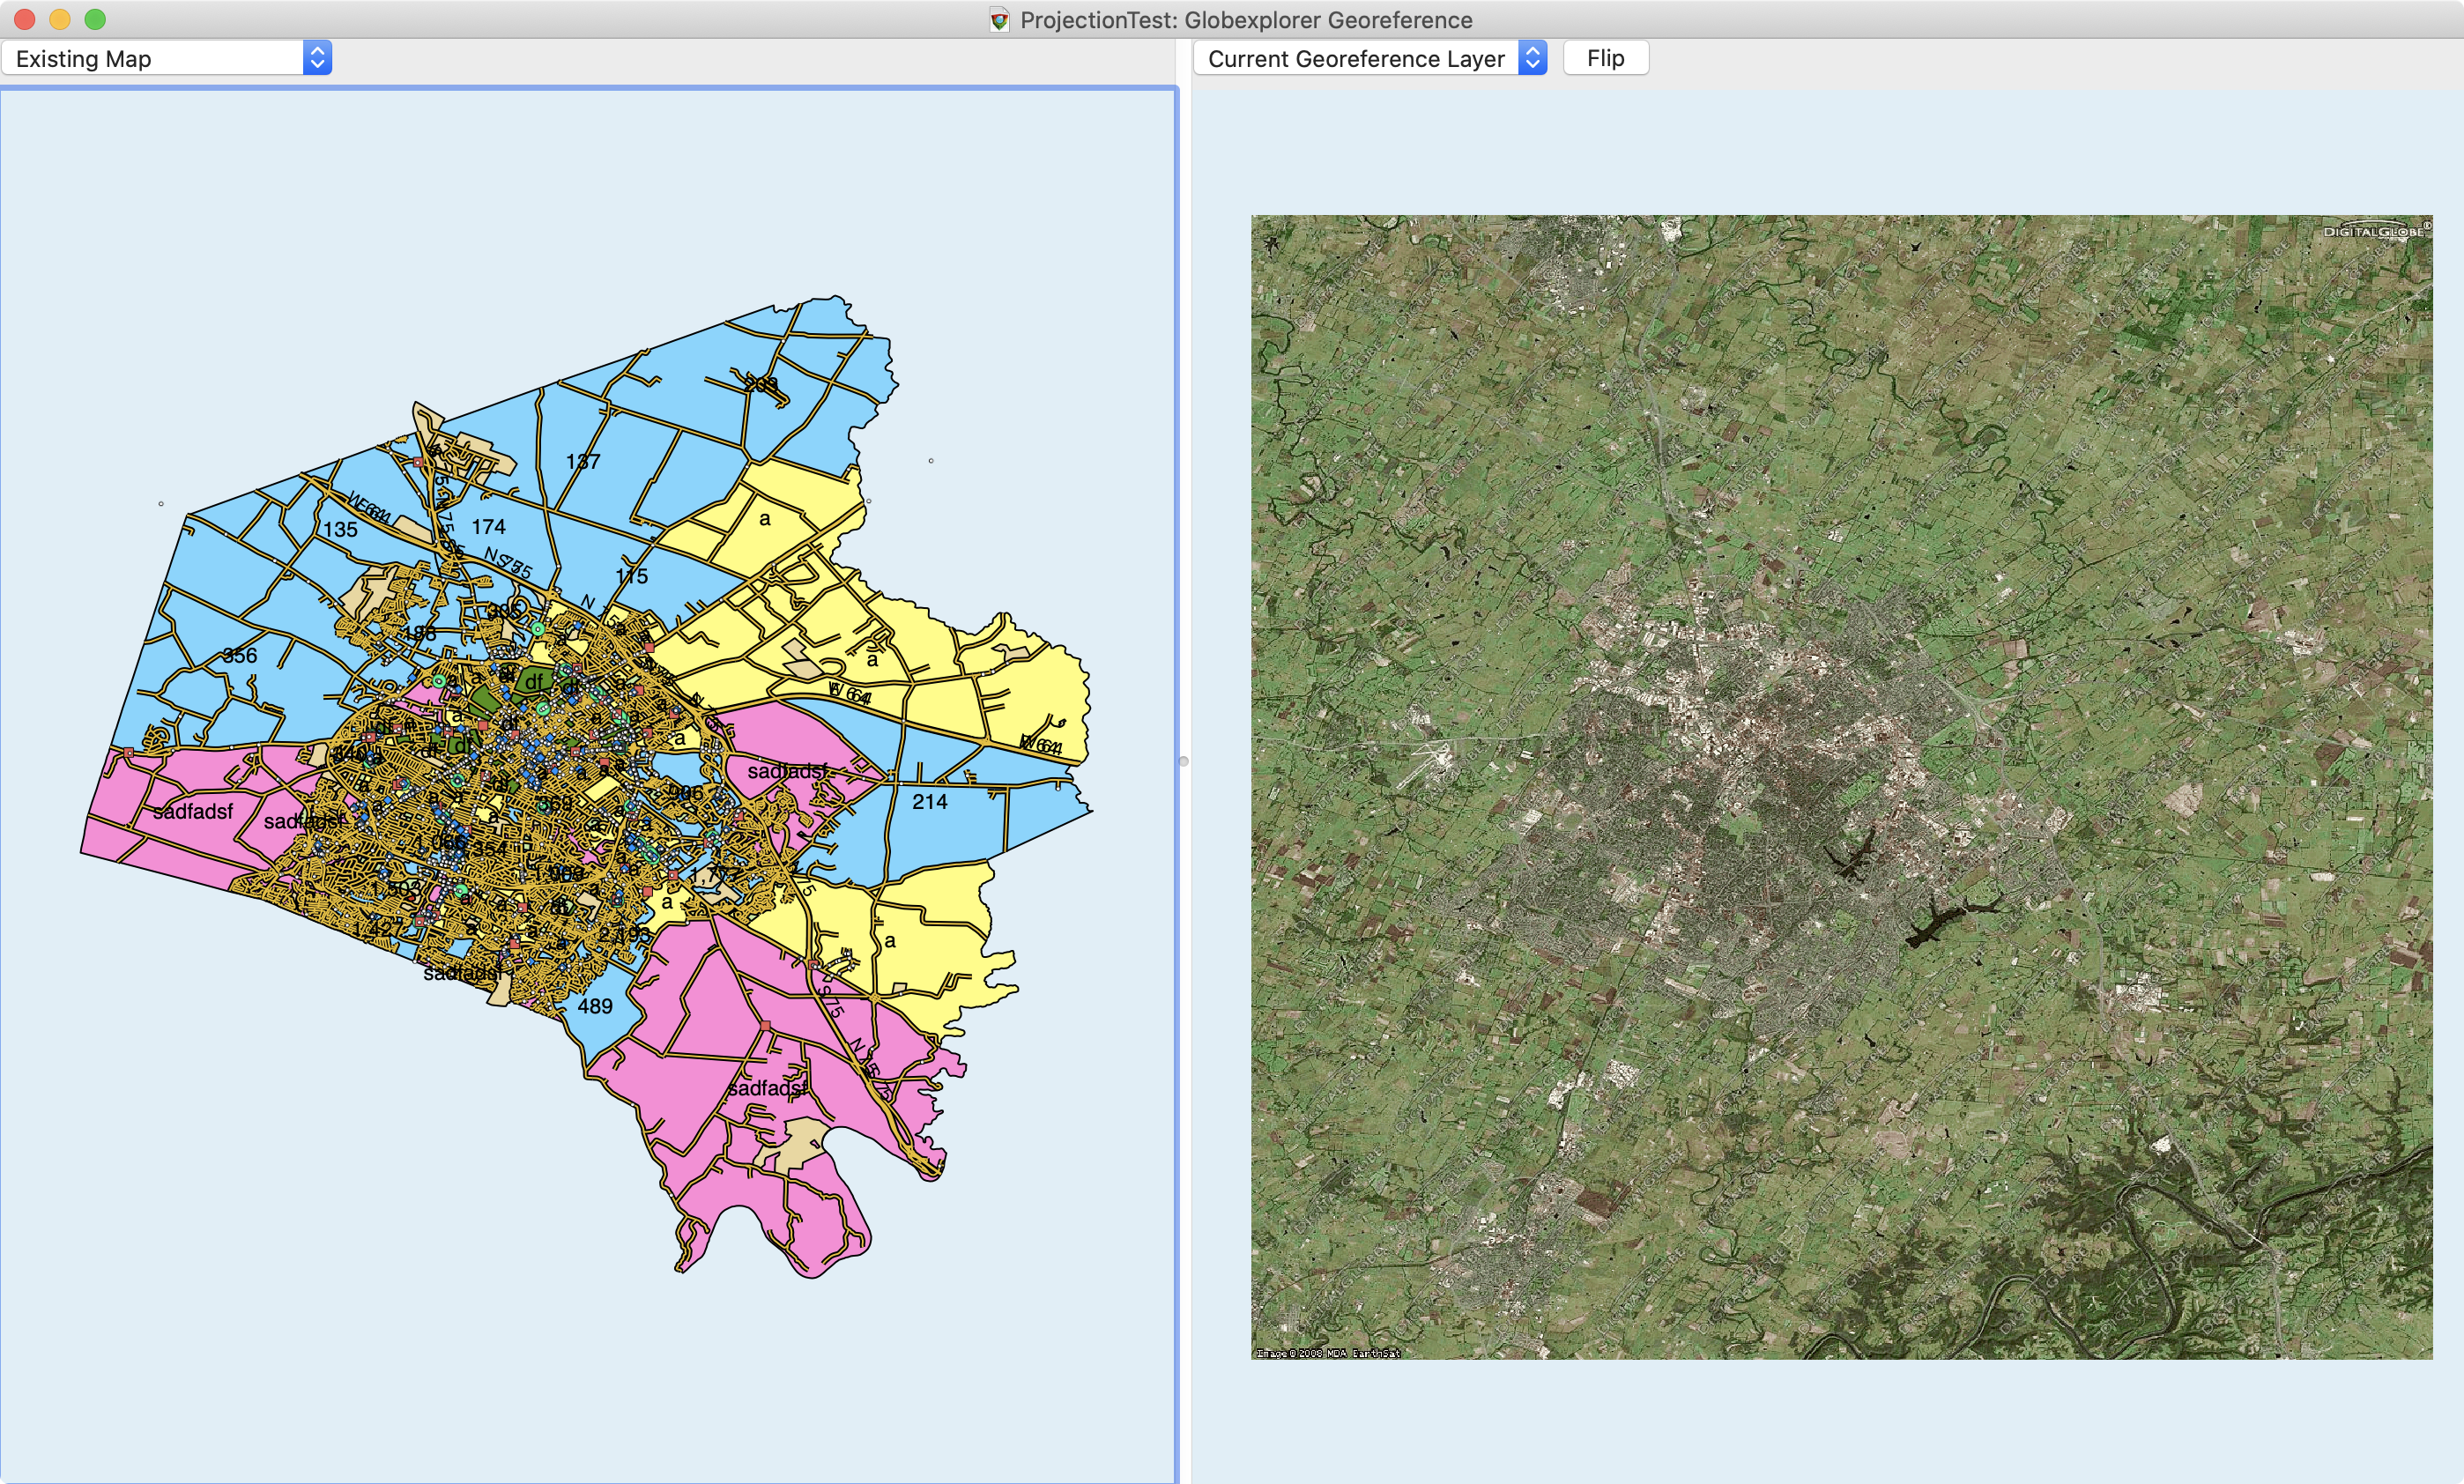
With side-by-side Georeferencing, Cartographica displays two separate maps in the same window (see below). The left side of this window contains the reference map (the Mapset you are currently working with, initially without the layer being georeferenced), and the right side of the window contains the layer to be georeferenced.
The general process is to use the standard option-click on one side and then the other to match points. Once you have at least 4 (although preferably quite a few more, especially if the points are not in a large area), then the layer can be georeferenced.
Begin with a Mapset into which you want to load the Raster imagery. This can be an empty Mapset, or one containing a multitude of layers. In general, you want to have at least one layer (so that you can set the Map Projection, which will be used as the projection for the georeference.
Choose > to import the desired Raster image into your Mapset. If it is not already georeferenced don't worry about any changes to the visuals in the Map, as they will only last until you have georeferenced the image. If it is distracting, or distorting your reference Mapset, you can uncheck the box next to the layer name to hide the layer.
Select the Raster layer to be georeferenced.
Choose >
The Georeferencing window will appear
If the reference material in your map is sufficient for the task, you're good to move on to the next step. However, if you desire to use a Live Map tile reference, you can use the drop-down menu above the reference (left) pane, to change from Existing Map to Live Map. By default, the the Live Map shows the map with roads. You can use the Map Style sub-menu to change between Roads, Aerial Imagery and Aerial Imagery with Roads.
You can use the tools in the Map menu to toggle between the Zoom, Pan, and Identify modes that work just like the same modes in a normal Map window.
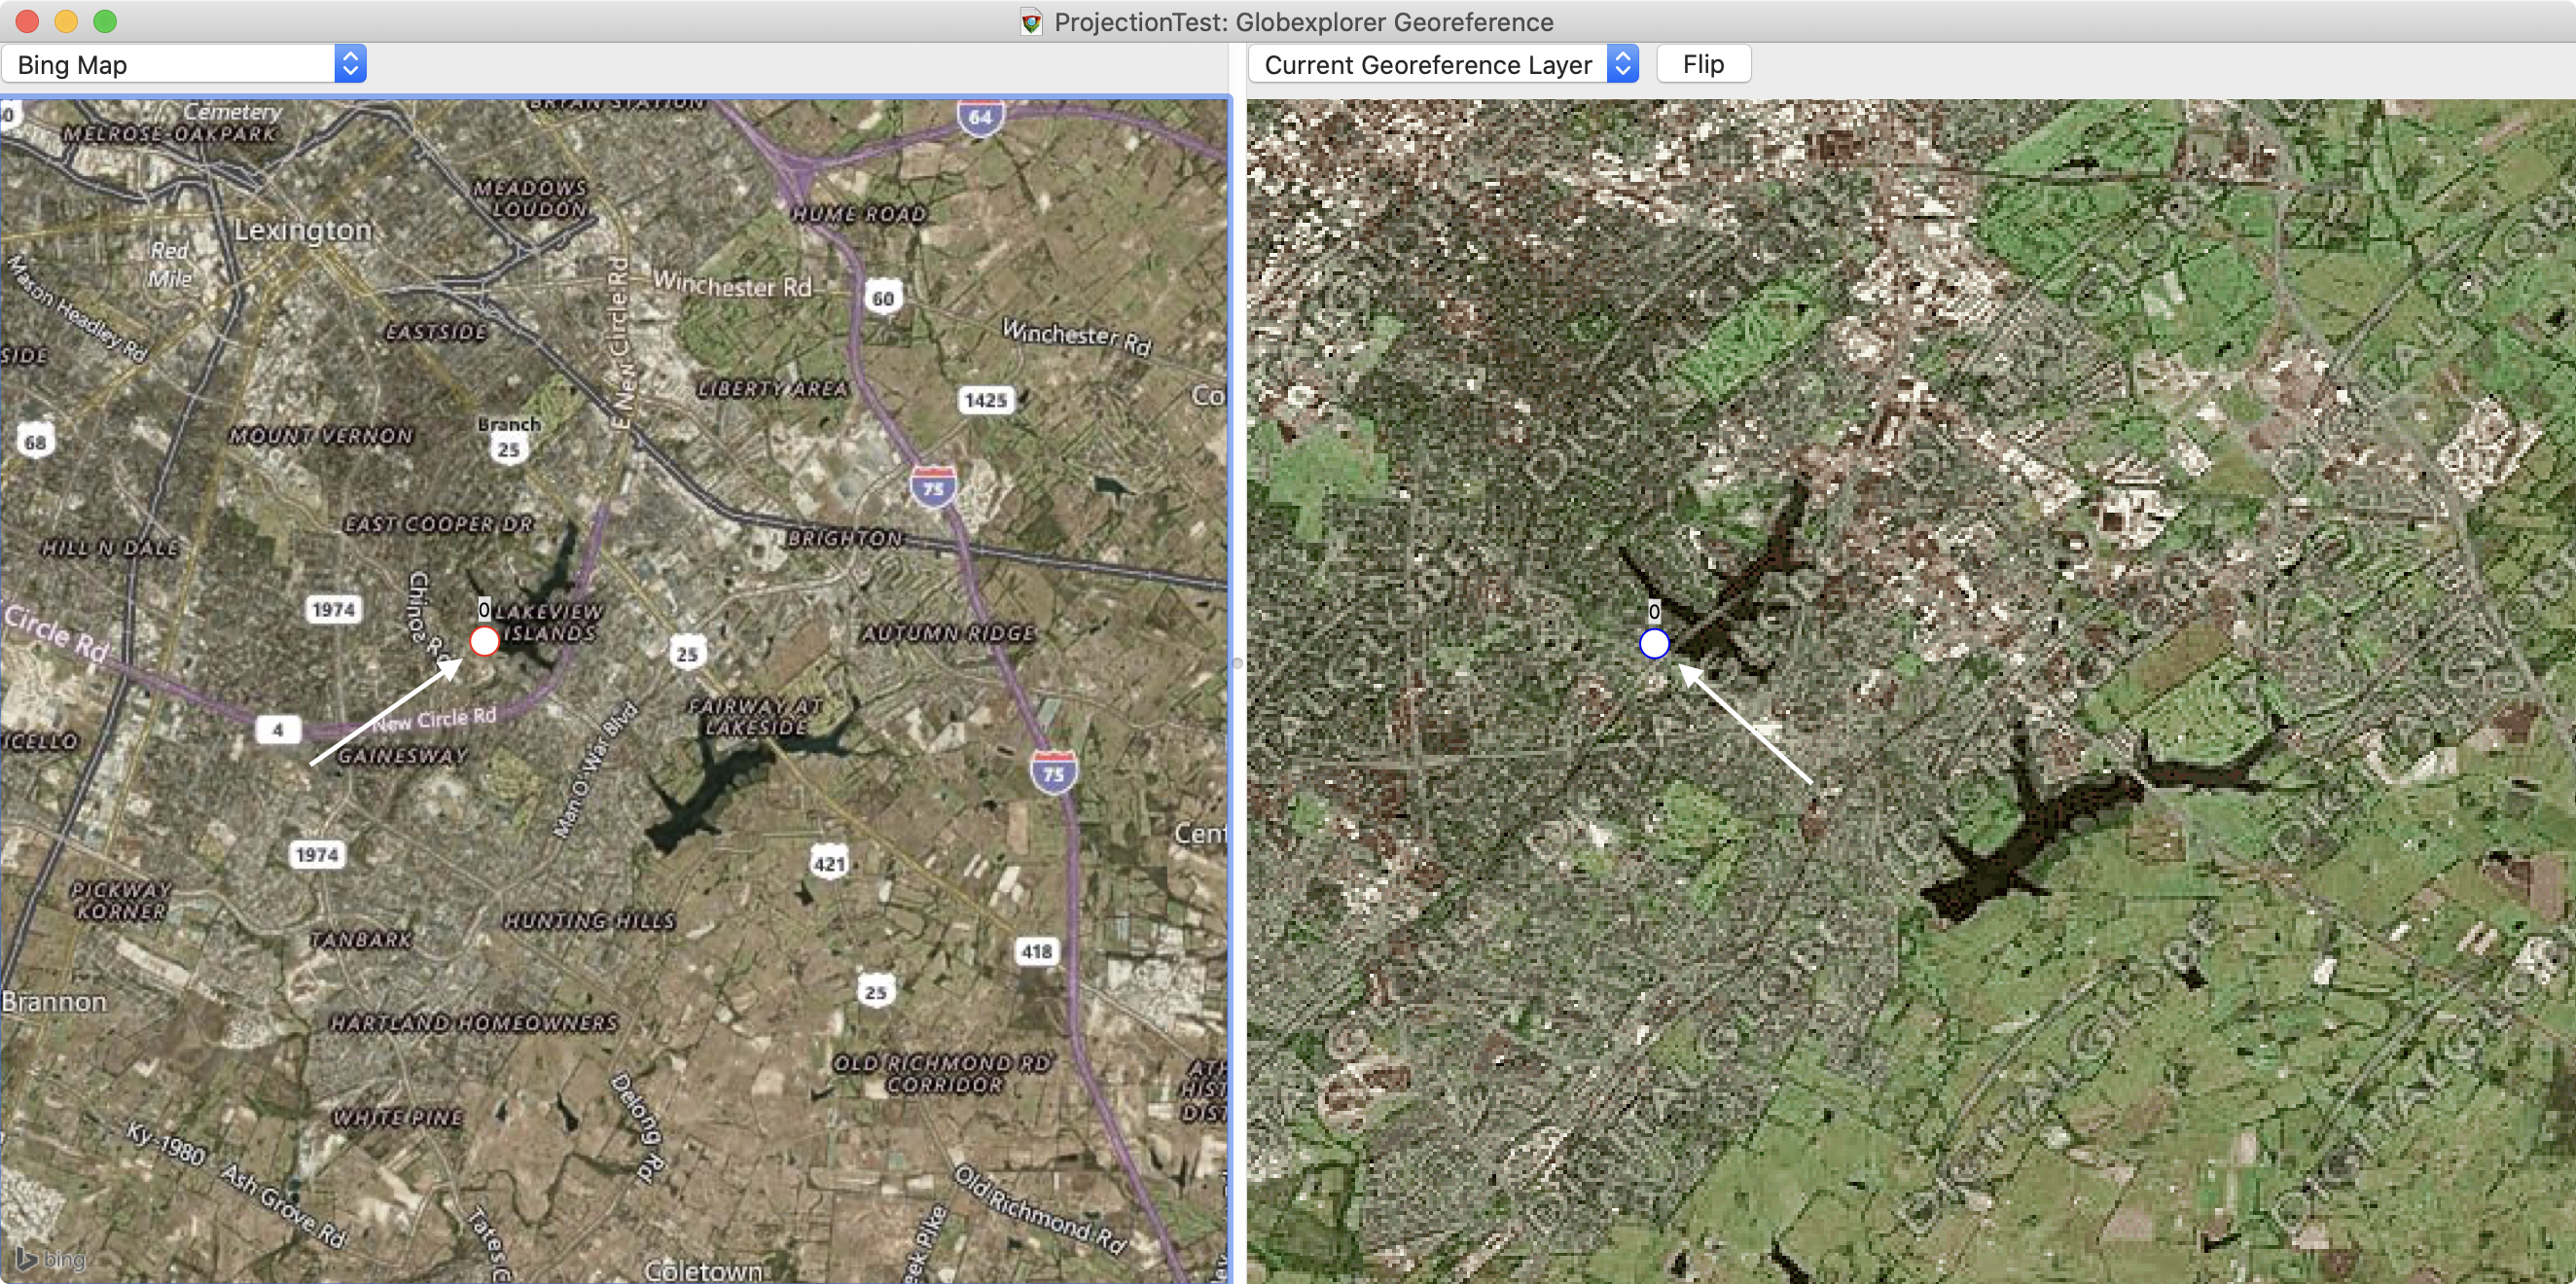
Once you have located a suitable reference point, use the Identify mode ( > ) and then control-click once on the left side to mark the reference location, and once on the right side to mark the image location. Once you've placed the markers on the map, they will be represented by a circle with a number atop it. The circle will be filled with white when the point pair is selected. Selecting a point on either side will select the corresponding point on the other side as well, as shown below:
If necessary, you can click on an existing point and move it (either by dragging it, or by nudging it using the arrow keys on the keyboard).
Repeat these steps until you have a suitable count (>4) and distribution (representing most of the area) of reference points.
When this is complete, close the Georeference window to save the georeferencing information.
Modifying Existing Georeference
There are times when an existing georeference needs changing. Cartographica treats the georeference points as data which travels with the Mapset, so you can edit the georeference points in the future if necessary to adjust precision in certain areas.
Select the Raster layer in your Mapset to edit
Choose >
The Georeferencing window will appear.
Edit the reference points as described above.
When complete, close the Georeferencing window to save the georeference information
If your image on the right shows upside down when you first begin, click on the button to flip the image vertically.
The Reference map menu on the left pane can be used to change between different reference maps while you perform the georeferencing. You may want to try flipping between a tiled reference, such as live maps and your existing Mapset.
When using your current Mapset as a Reference map, you can also toggle the inclusion of the georeference layer itself by choosing in the map menu. This provides basically an in-situ preview.