Cartographica contains a number of features to quickly analyze and add columns containing information about your geospatial data. We'll briefly touch on each mechanism and procedure to do these
Adding Coordinates Columns for Points to the layer
This function adds coordinate columns (X, Y, and optionally Z and M) from the selected point layer. These data are added to your data table. To add coordinates columns,
Select the target layer in the layer stack
> .
Adding an Area Column to the layer
Select the target layer in the layer stack
To add an Area column, > .
Adding a Length Column to the Layer
Select the target layer in the layer stack
To add an Area length column, > and the column is added to the layer.
You are adding a length column that displays the length (in layer units) of the lines in the line or polygon. It is important to note that complex features (polygon layers) have all of their lines summed total length of all line segments in the polygons, but are measured as their actual length, not as a string of points.
For example if you have a complex line which contains a line from San Francisco to Salt Lake and a line from St. Louis to Washington, DC, the length of that line is the sum of the two lines, not the total distance from San Francisco to DC stopping in Salt Lake and St. Louis.
For polygons, the data is the length of all line segments in each line. So a polygon with a hole (donut) will have a length equal to the length of the exterior border of the donut plus the length of the interior border of the donut.
Adding a Midpoint Coordinates Column to the Layer
Select the target layer in the layer stack
You can add the coordinates of the midpoints of selected line (only) layers. You are essentially adding a midX and midY column showing the midpoint of the lines contained in each feature.
To add a midpoint coordinates column, > .
If used with complex lines (such as lines with a gap), the midpoint shown will be half-way along the total distance of the line. In the example used in Adding a Length Column, the "midpoint" will actually appears as east of St. Louis, since the line from San Francisco to Salt Lake City is shorter than the line from St. Louis to Washington, DC.
Adding a Centroid Coordinates Column to the layer
Select the target layer in the layer stack
You can add columns for the coordinates of the centroids of the selected polygon layers. Adding Centroid columns works only with Polygons.
The centroid is the center of gravity of the polygon. If you have a unit square, the centroid will be at .5,.5. If that unit square has a hole that is off center, then it won't be. Note also that in the case of complex polygons or polygons with concavities, the centroid may be outside of the polygon. However, it is always within the extent of the complex polygon. This adds cenX and cenY columns to the selected layer.
To add Centroid Coordinates Column, > .
Adding a Column showing the Distance to Nearest Feature
You can calculate the nearest distance between the points in a point layer and the features in another layer. This can be used to calculate nearest neighbor to objects in the same layer or nearest distance to points, lines, or edges of polygons.
![[Note]](Graphics/note.svg) | |
It is not only possible, but often desirable to add distance to the nearest points in the same layer. In this case, you must be careful to change column names if you want to add any data columns from the source. Otherwise, you may overwrite the original data with the data from the nearest feature. |
![[Warning]](Graphics/warning.svg) | |
Distance to polygons is the distance to the nearest edge and does not treat specially the case of being "inside" of a polygon. So, if your point is 5 meters inside of a polygon, the distance will be 5 meters from the polygon, just as it would be if the point were 5 meters outside of the polygon. |
Select the target layer in the layer stack
Choose > .
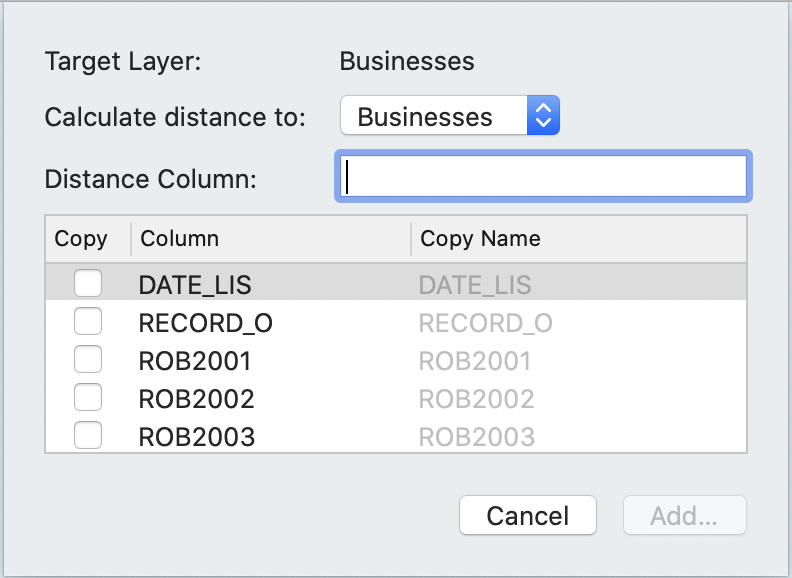
The Distance to Nearest Feature sheet appears, showing the Target Layer into which the distance is to be added.
Choose the layer whose features you would like to measure to with the Calculate Distance to pop-up menu.
Enter a name for the new column in the Distance Column box.
Optionally, select columns to copy from the Calculate distance to layer to the Target Layer by checking the Copy box next to the column name and changing the resultant column name (if desired) by putting a new value in the Copy Name column.
Columns that exist in the Target Layer are used when copying data, so be careful to change the column name if you don't want to overwrite data in the existing layer.
Click to create the column and perform the calculation.